Dizzy Pig Pitmaster Chris Capell’s Beef Brisket
In the barbecue world, there’s not much better eating than biting into a perfectly cooked slice of beef brisket! Until you’ve tried it, you’ll just have to try and imagine the ultimate bold flavor that shouts BEEF more than any other cut on the cow.
BUT, as most folks will agree, brisket is the most difficult barbecue meat to cook consistently!
Enter the Dizzy Pig Competition BBQ team.
Our competition team has cooked a ton of briskets since they began competing professionally in 2002. Actually, when you do the math, it is over 2 tons. But the fact is, Dizzy Pig racked up almost 70 top ten brisket finishes in their first 120 contests — which includes 8 trips to the American Royal Invitational, and 7 invitations to the Jack Daniels World BBQ Championships. We’ll show you how to smoke a brisket in this recipe.
We find that there is a small window to hit in order to get a perfectly moist, tender and flavorful end result. But success can be achieved by:
- Choosing a quality whole brisket with good fat content
- Using a top quality rub with a flavor that can stand up to the long cook
- Cooking it with a good clean burning fire with the right amount of smoke
- Getting the meat off the heat as soon as it becomes tender
First time Smoking Brisket? Check out our Dizzy Tips!
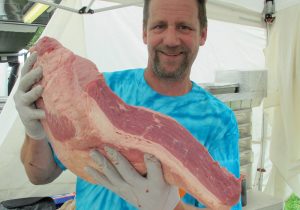
How to Select Your Beef Brisket
Don’t forget, there are many roads that lead to a great bite of BBQ! So don’t let anyone tell you there is only one way, or that you have to follow certain precise steps. There is some art involved, so you’ll want to develop your own method that suits your cooker, your time frame, and your style.
This is the way we do it.
 Cooking Method
There are many roads to cooking a good brisket, from low and slow to hot and fast.
I’ve settled in on the low side for my briskets, and 235-240°F is the pit temperature that works best for me on my personal cooker, the Big Green Egg. The key is to cook it until a tantalizing bark (or crust) is formed on the outside as the seasoning, the smoke, and the beef all combine to create a magical flavor.
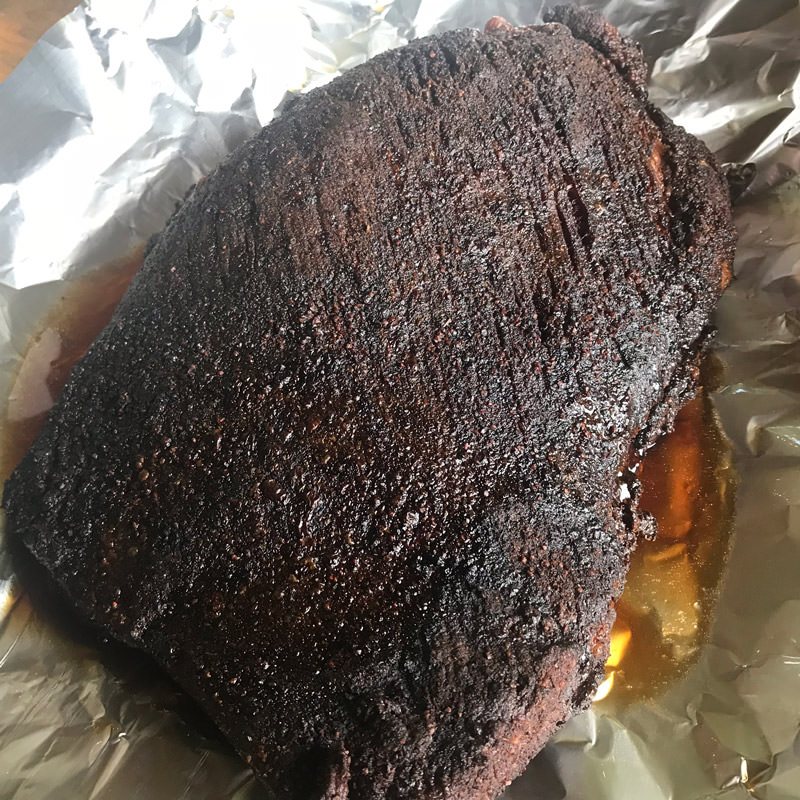
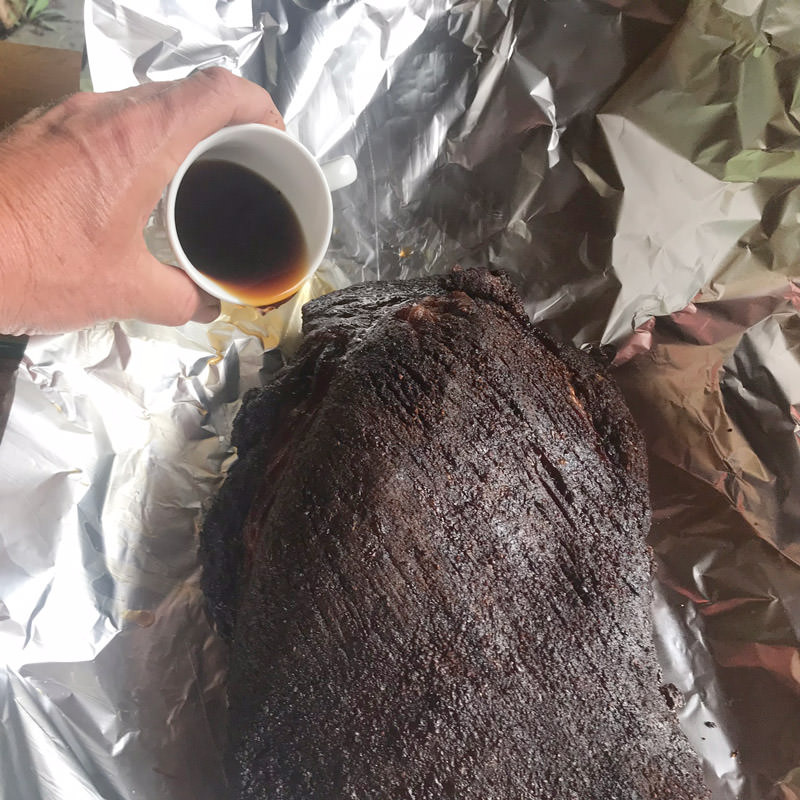
Most competition cooks, including us, like to wrap the brisket in aluminum foil once we’ve built up all the flavor and color we want on the meat. It will stop additional moisture loss and speed up cooking while you cook the brisket to the stage that it is tender.
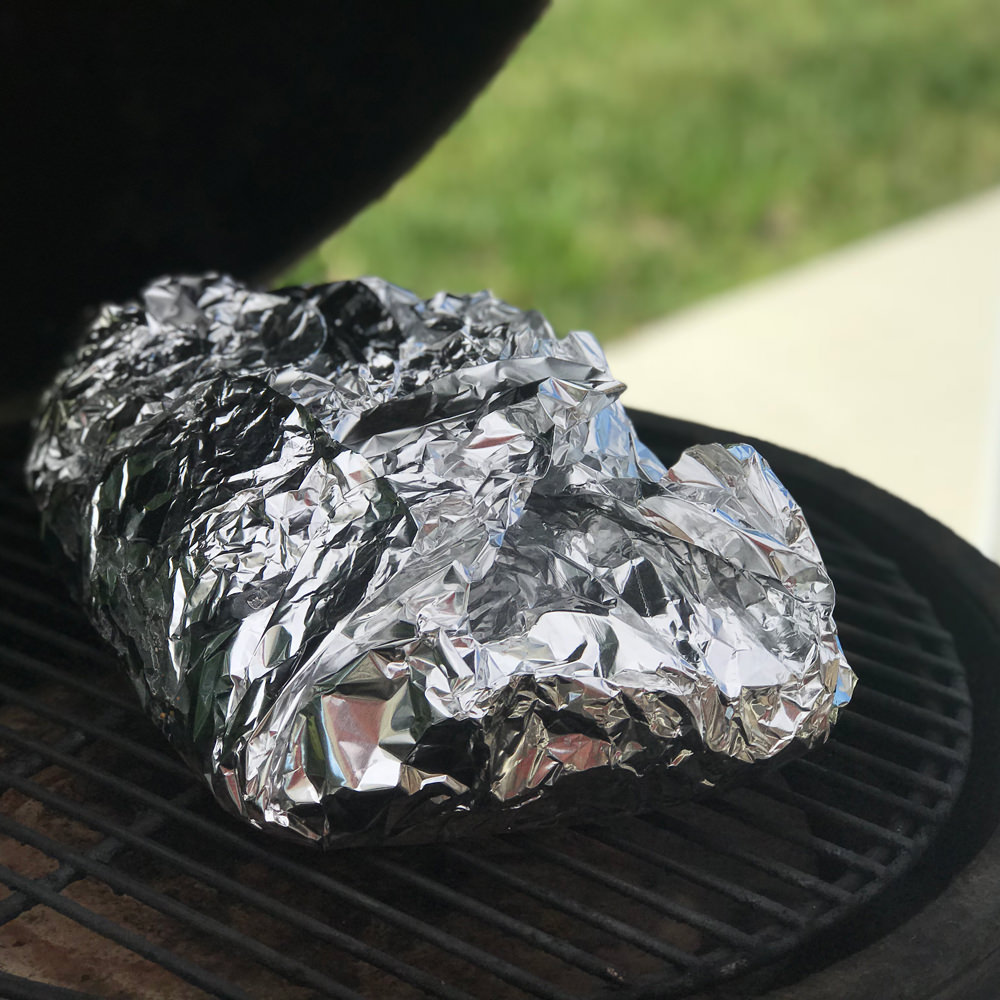
Once the brisket is foiled and back on the cooker, monitor the internal temperature of the flat. When that temperature is 190°F, begin checking for tenderness. We use the probe of the thermometer to check for tenderness.
 Checking for Doneness
It takes a little practice, but you can determine a great deal by pressing the probe into the brisket flat and pulling it out.
- If you try to pull out the probe and it resists, then you have not quite reached that tender stage yet. Check again in another 15 minutes.
- When the probe pulls out as easily as it goes in, remove from cooker immediately. We like to open the foil and let it steam off for just a few minutes before closing foil and resting in a cooler or under a blanket.
 What Temperature to Cook to?
In a nutshell, there is no magic number. The brisket is tender when it is tender, and the finish temperature can vary widely depending on a large number of factors. For example,
- If you decide not to wrap your brisket then it will take longer to cook. The additional cooking time allows more time for collagen to break down, and your finish temp will be lower.
- On the flip side, if you speed up your cook by wrapping in foil then your finish temperature will be higher. We’ve seen finish temperatures range from 185°F to 215°F!
Trust your sense of feel and you’ll get much more consistent results. Deciding when to pull the brisket off the cooker is absolutely the most important step to help you achieve brisket bliss, so take this step seriously.
Ingredients
- 13-18 lbs whole “packer” brisket (at least USDA Choice Grade)
- 2-3 Tbsp coarse salt
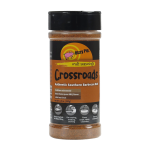
- 1/2 cup Dizzy Pig Cow Lick beef rub (our Crossroads Southern BBQ rub is also excellent, or use your favorite beef rub)
- 1/2 cup brewed black coffee (for foil wrap)
Brisket injection — Optional (makes enough for 1 brisket)
- 2 cups beef stock (the richer and beefier the better
- 2 Tbsp salt
- 1 Tbsp MSG (optional)
Directions
Prepare brisket
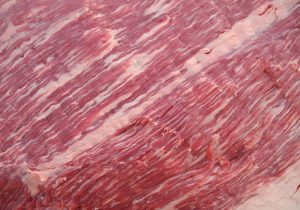
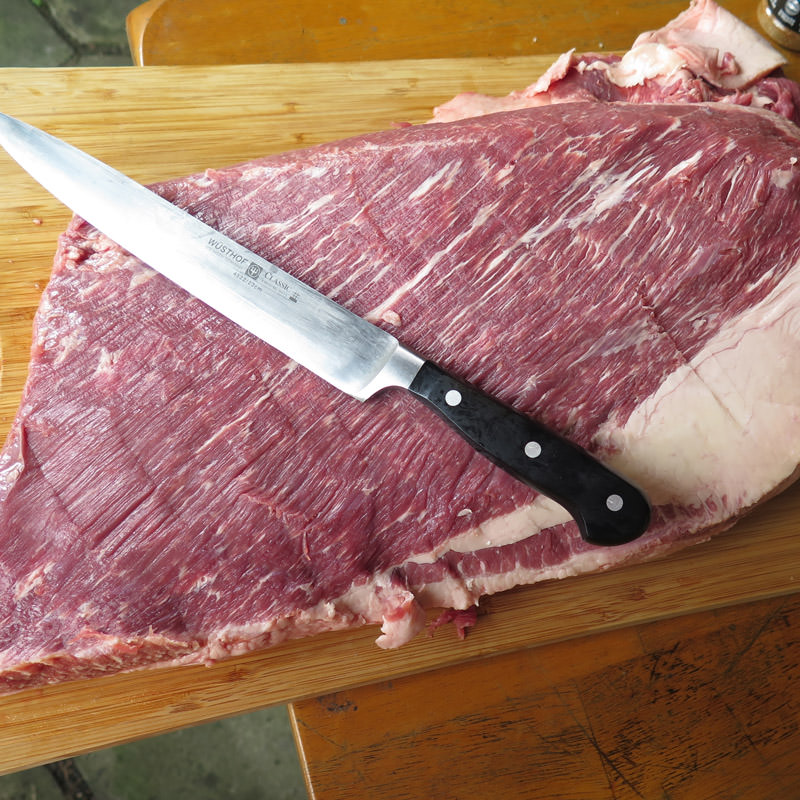
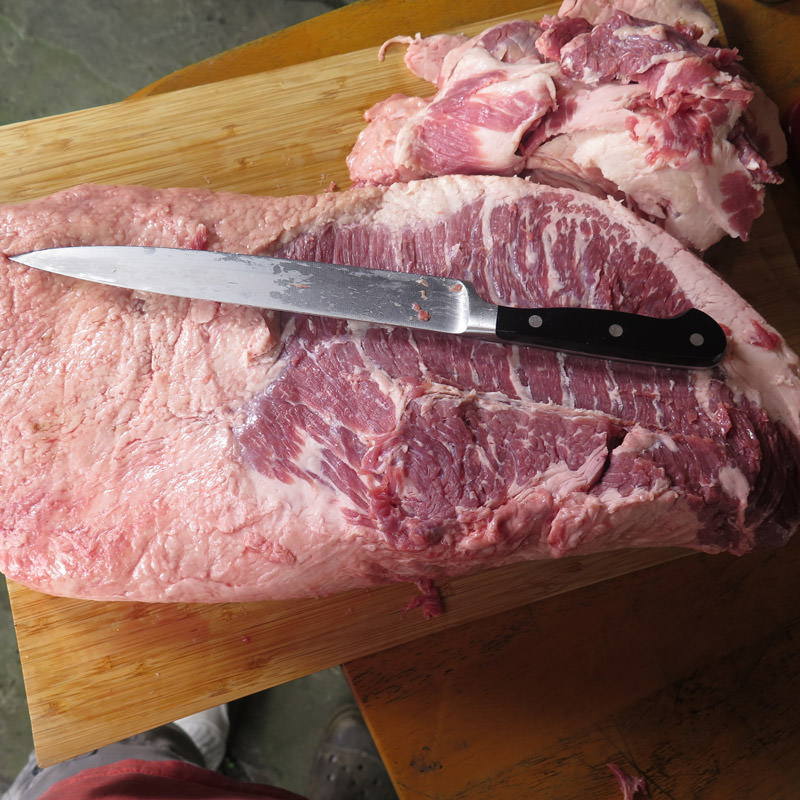
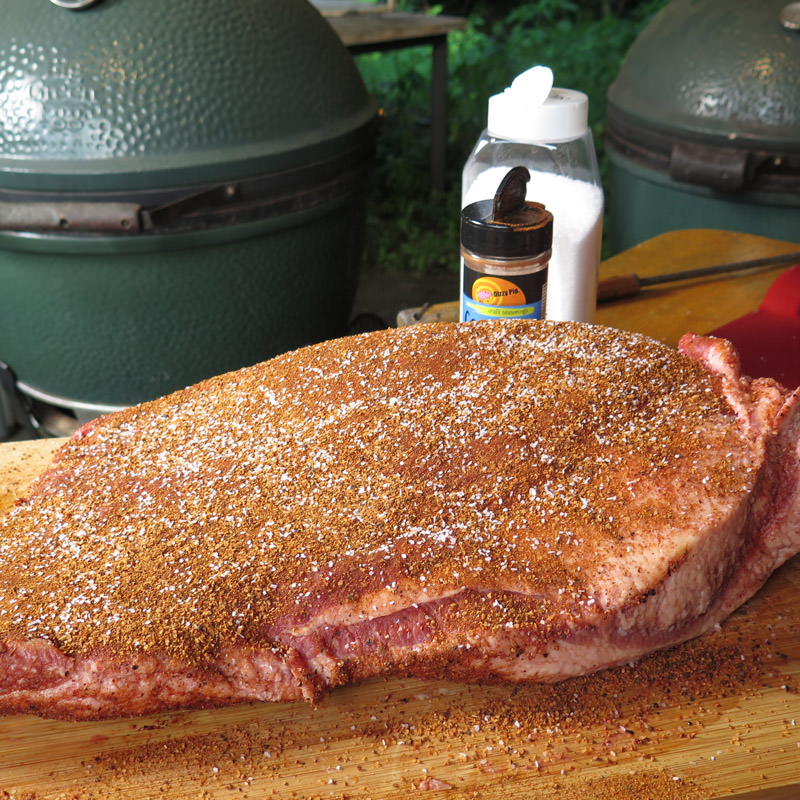
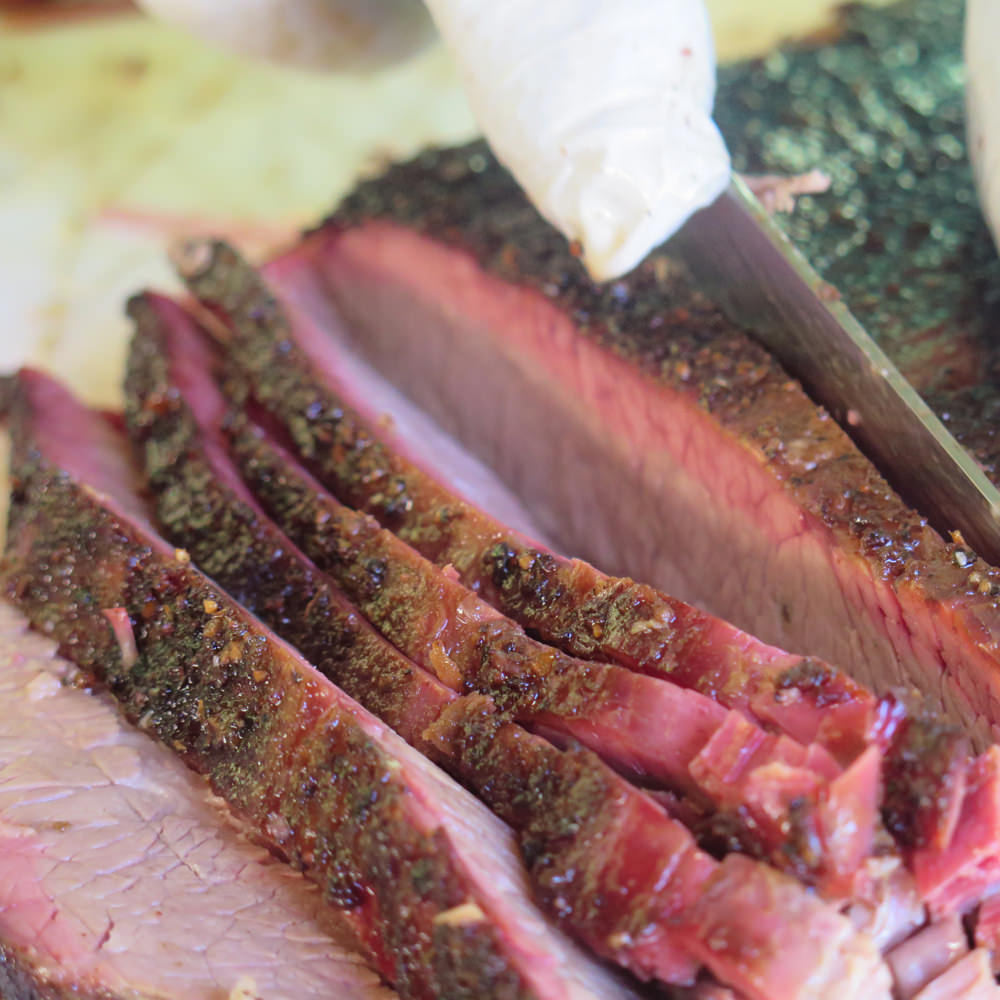
- With sharp knife, trim off all membranes, silver skin, and globs of fat off of the top side of the “flat”.
- On the other side, you’ll usually see a substantial layer of fat that covers the point, and part of the bottom of the flat. Trim fat off the point muscle (thicker half of brisket) to expose the meat, but leave all the fat on where it covers the flat. That will protect it from the drying heat.
- Mix injection ingredients (if you are injecting)
- Inject brisket evenly against the grain in both the flat and the point.
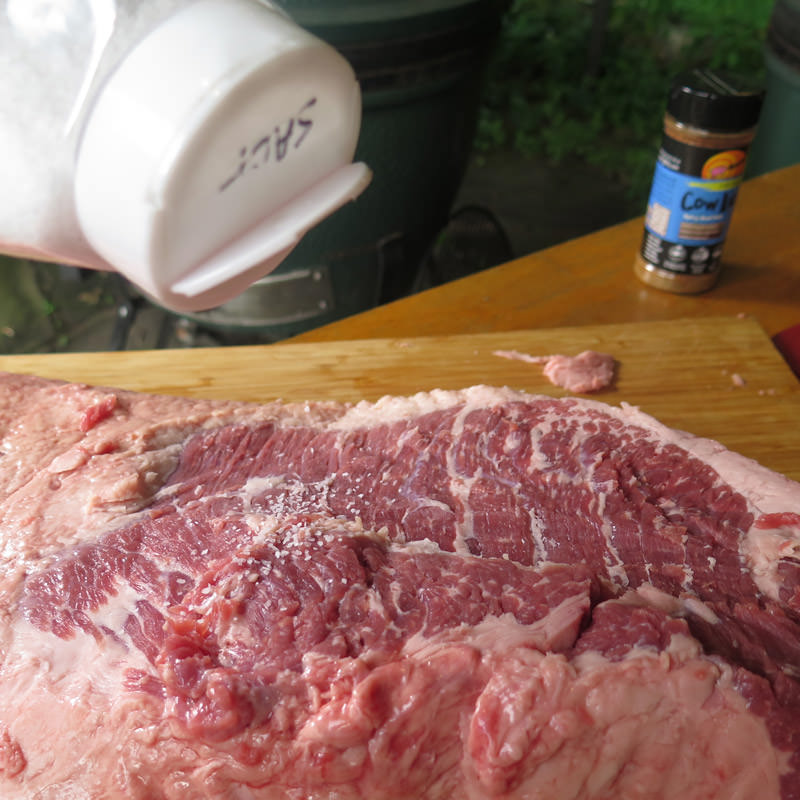
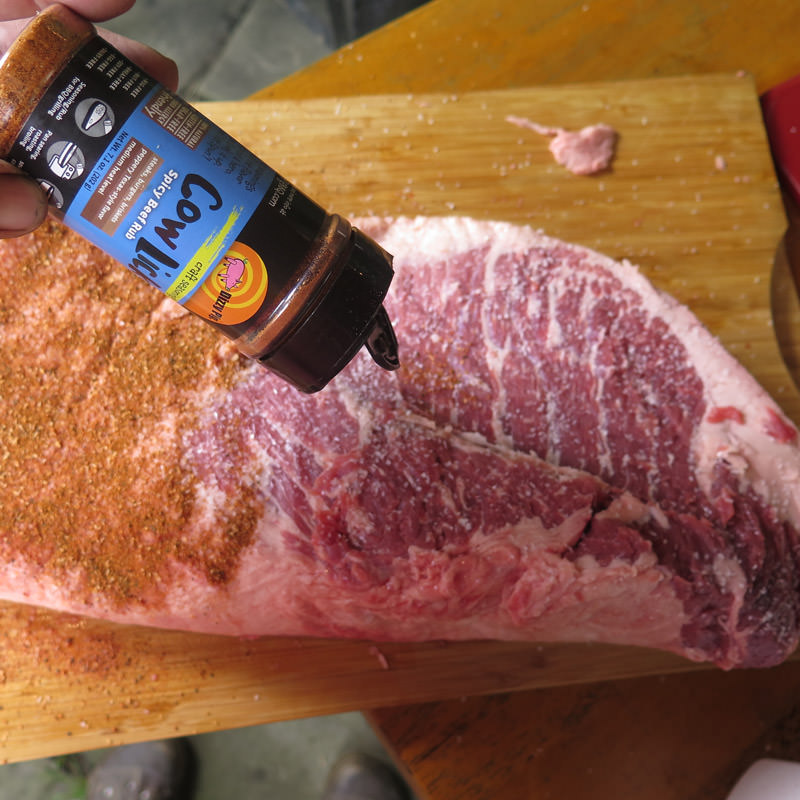
- Sprinkle some salt on the brisket. Dizzy Pig seasonings are not heavily salted. It’s a big piece of meat and can benefit from the additional salt. If using a very salty seasoning, skip this step.
- Season brisket liberally on all sides. We typically use 1/2 cup of Dizzy Pig Cow Lick on a 12-14 pound brisket.
Prepare smoker
- Prepare your smoker with charcoal and/or wood, and stabilize at 235-240°F.
- Ensure that your smoke is clean and sweet smelling. The last thing you want is a strong bitter smoke on your brisket. Use quality charcoal, dry wood, and give the fire time to burn cleanly. I use red oak, but hickory, maple, cherry and many other woods are excellent. Use what is available in your area, or your favorite.
Smoke brisket
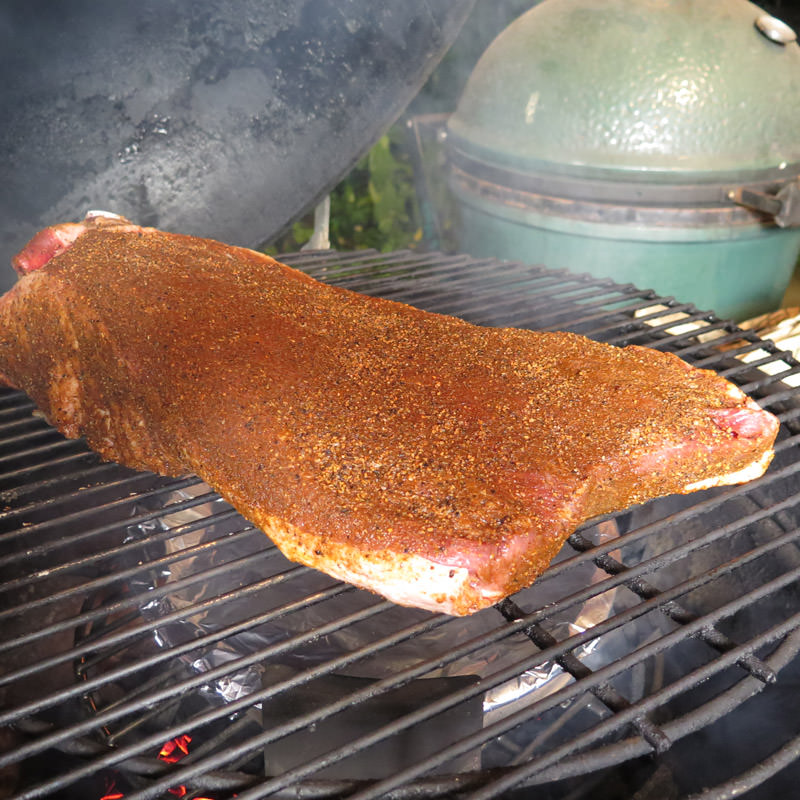
- Place brisket on cooker, fat cap down and with the “point” end toward the hotter part of your cooker.
- Cook for approximately 8-10 hours until brisket has formed a dark flavor crust, and is approximately 165-175°F internal temperature.
- Double wrap in aluminum foil, or place it covered pan. Add about 1/2 cup liquid…brewed coffee and/or beef stock are my choice.
- Return tightly wrapped brisket to smoker, and cook for 2-4 more hours. Be careful not to puncture foil and lose your liquid.
- Begin checking tenderness when internal temperature in the thickest part of the flat is 195°F. Your thermometer probe should slide in and out with little resistance. If it tugs back on you, wrap it back up and check again in 15-20 minutes.
- Once tender, remove from cooker, cover with towels/blanket or place in cooler, and rest for 1-3 hours before slicing.
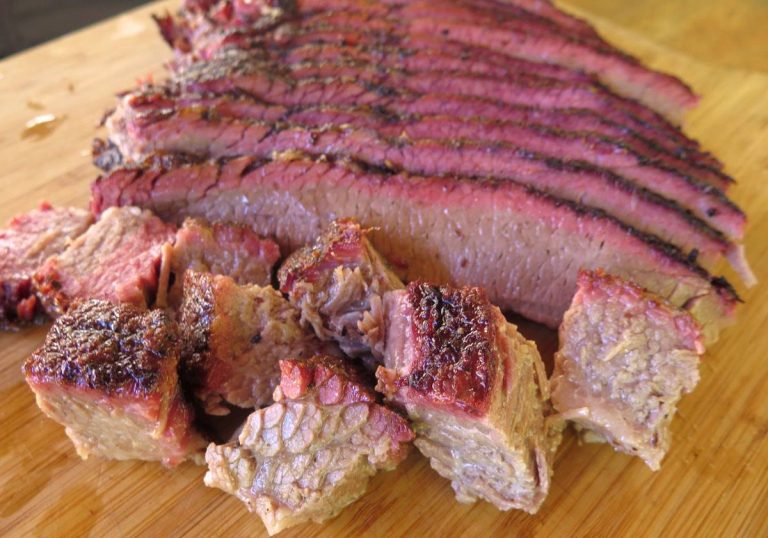
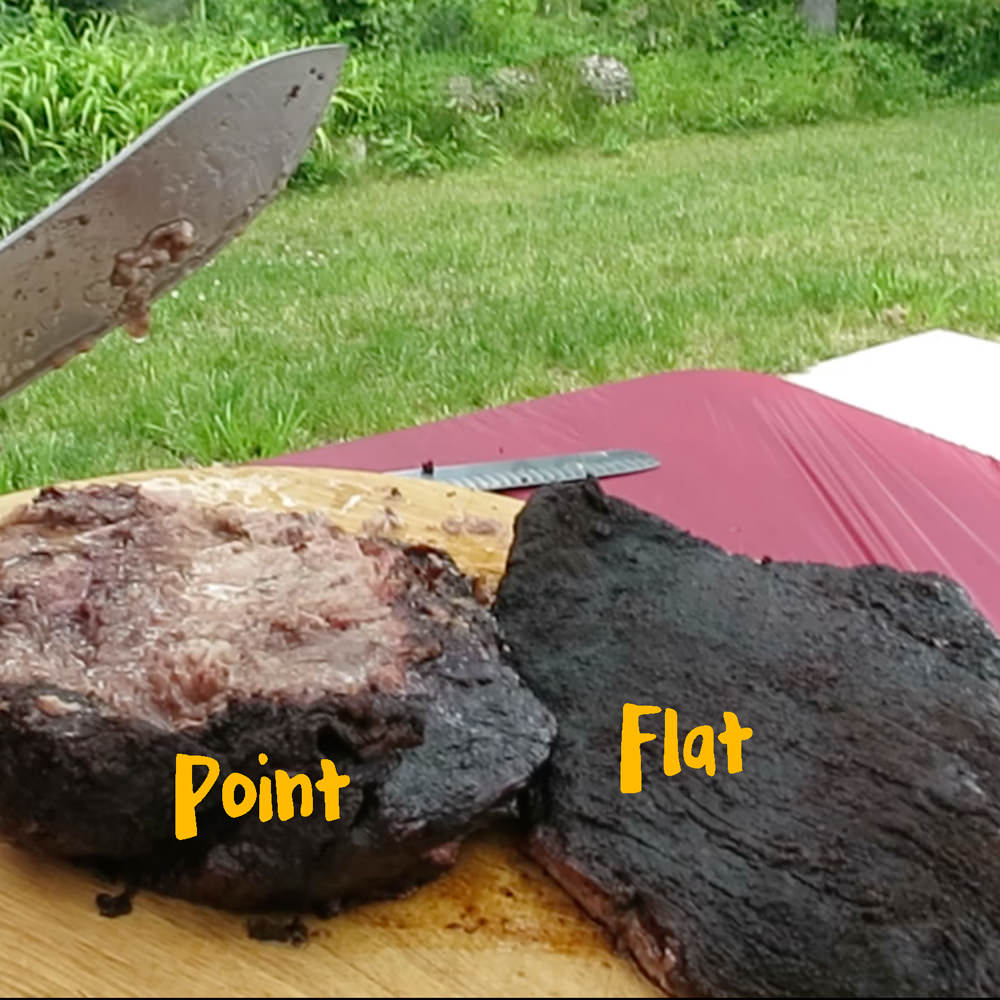
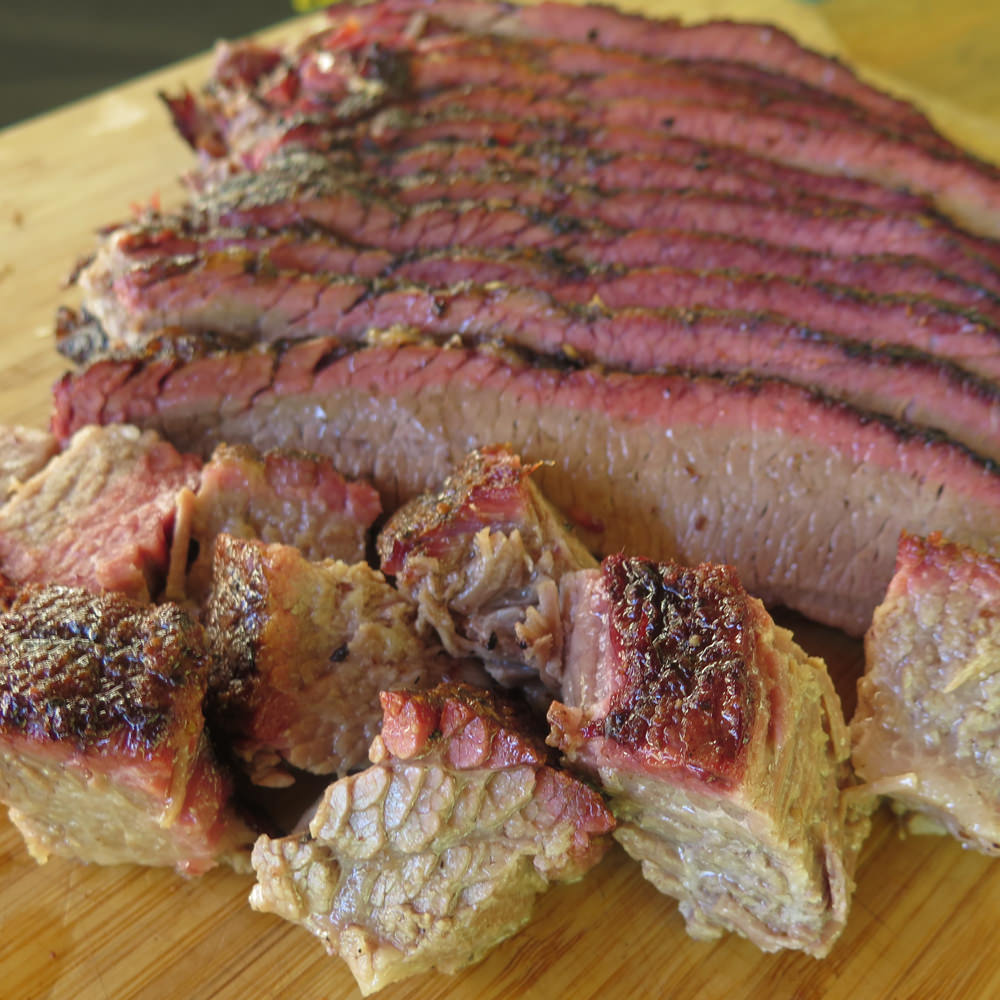
- When ready to serve, separate point and flat along fat line between the 2 muscles.
Serving
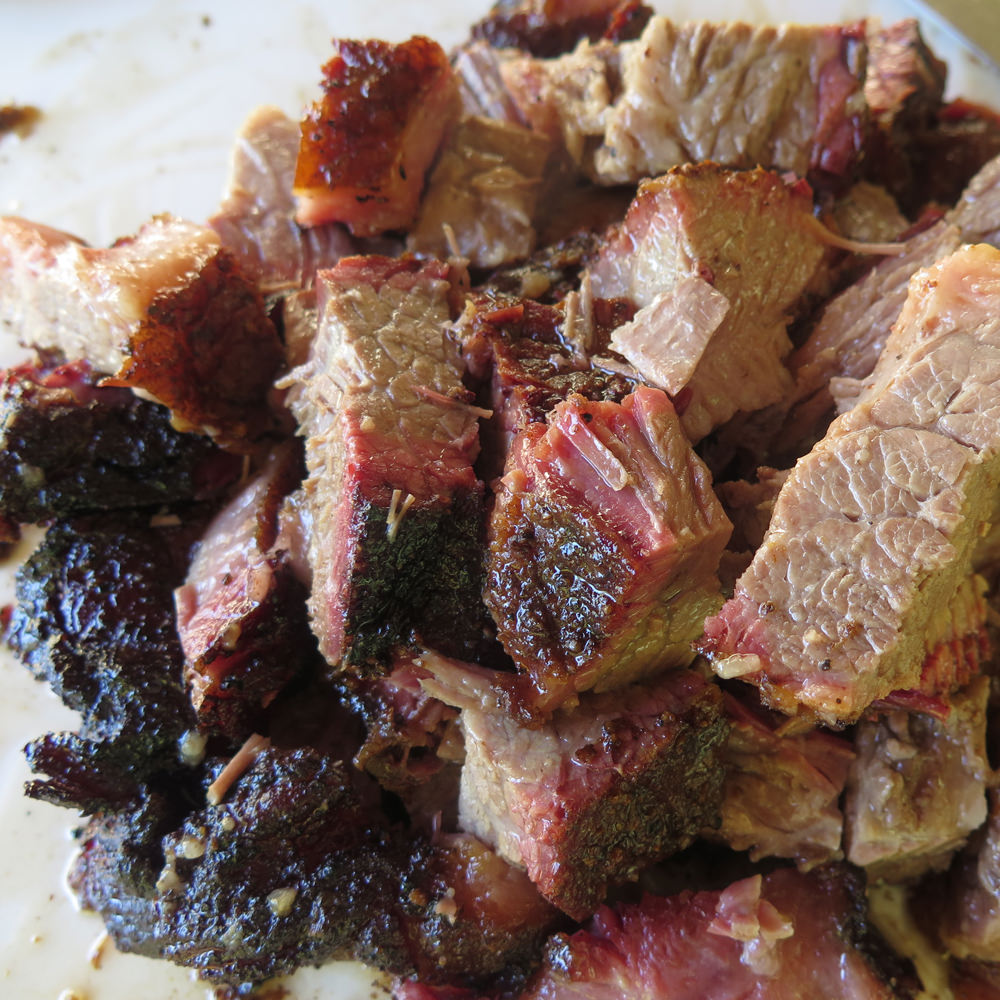
- With sharp carving knife, cube point.
- Slice flat across the grain, and serve.
In This Recipe:
Related Blog Posts:
Dizzy Tips: How to Select Beef Brisket
In order to make good slow-cooked barbecue brisket, many things have to come together,…
Dizzy Tips: Choosing the Best Meat for your Barbecue
Learning to take tough cuts of meat and cook them to be tender, moist, flavored…
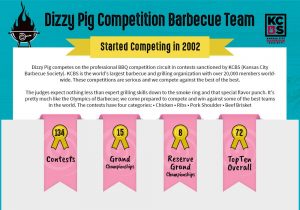
Dizzy Pig Competition Barbecue Team Stats
About Competition Barbecue Contests Dizzy Pig competes on the professional circuit in competition barbecue contests…
What Else is Cooking?
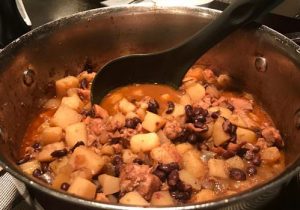
Molé Chicken Stew Recipe
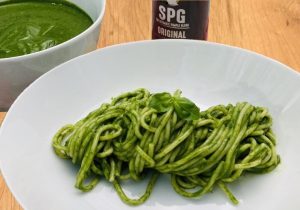
Spinach Basil Sauce for Pasta
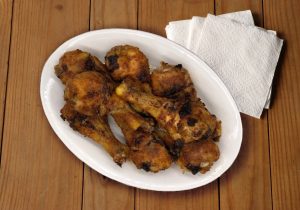
DrBBQ’s Air Fryer Fried Chicken Legs

Spare Ribs Dizzy Style
Step by Step

With sharp knife, trim off all membranes, silver skin, and globs of fat off of the top side of the “flat” Trim fat off the point muscle (thicker half of brisket) to expose the meat, but leave all the fat on where it covers the flat Sprinkle some salt on the brisket Season brisket liberally on all sides We typically use 1/2 cup of Dizzy Pig Cow Lick on a 12-14 pound brisket Ensure that your smoke is clean and sweet smelling. Place brisket on cooker, fat cap down and with the “point” end toward the hotter part of your cooker Cook for approximately 8-10 hours until brisket has formed a dark flavor crust, and is approximately 165-175°F internal temperature Double wrap in aluminum foil, or place it covered pan. Add about 1/2 cup liquid. Brewed coffee and/or beef stock are my choice Return tightly wrapped brisket to smoker, and cook for 2-4 more hours. Be careful not to puncture foil and lose your liquid. Begin checking tenderness when internal temperature in the thickest part of the flat is 195°F When ready to serve, separate point and flat along fat line between the 2 muscles With sharp carving knife, cube point Slice flat across the grain Brisket ready to serve!


Did you make this recipe?
If you made this, snap a pic and tag it with @dizzypigbbq. We’d love to see and share your creations!