Dizzy Pig’s competition pitmaster Chris Capell has cooked over 1,000 slabs of ribs in competitions alone – with plenty of awards to show for it. In that time he’s learned a lot about cooking one of America’s favorite BBQ treats.
There are a lot of roads to a moist, plump, and tender rib, and it can be confusing trying to choose a method from the plethora of recipes floating around. Chris has been honing his skills for tender ribs for over 17 years, and he is excited to share his favorite competition method with you!
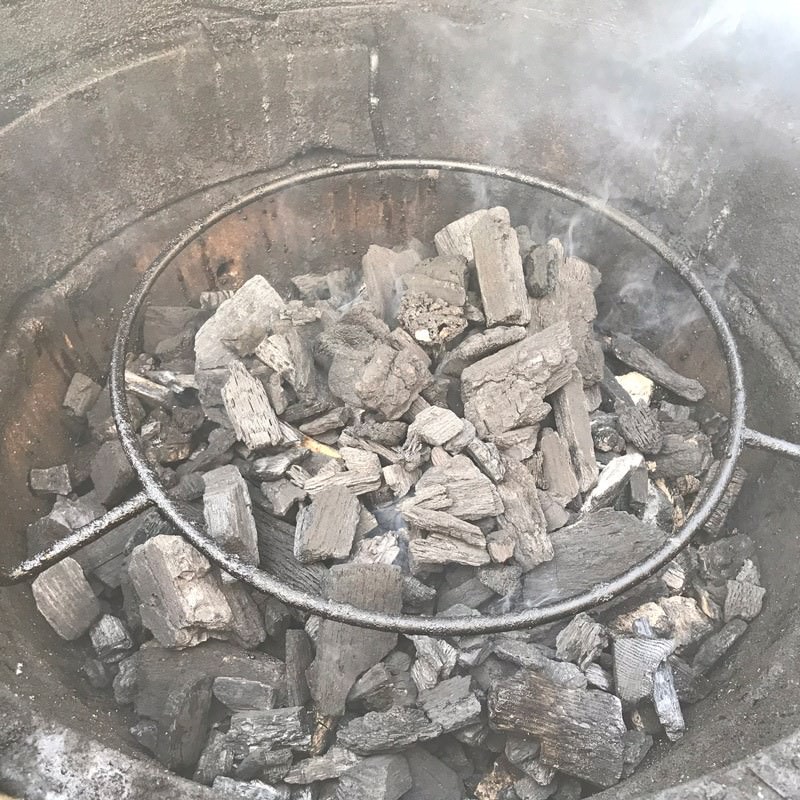
Chris personally cooks his ribs on the Big Green Egg, but this recipe is adaptable to any grill or smoker that can be set up to cook with indirect heat.
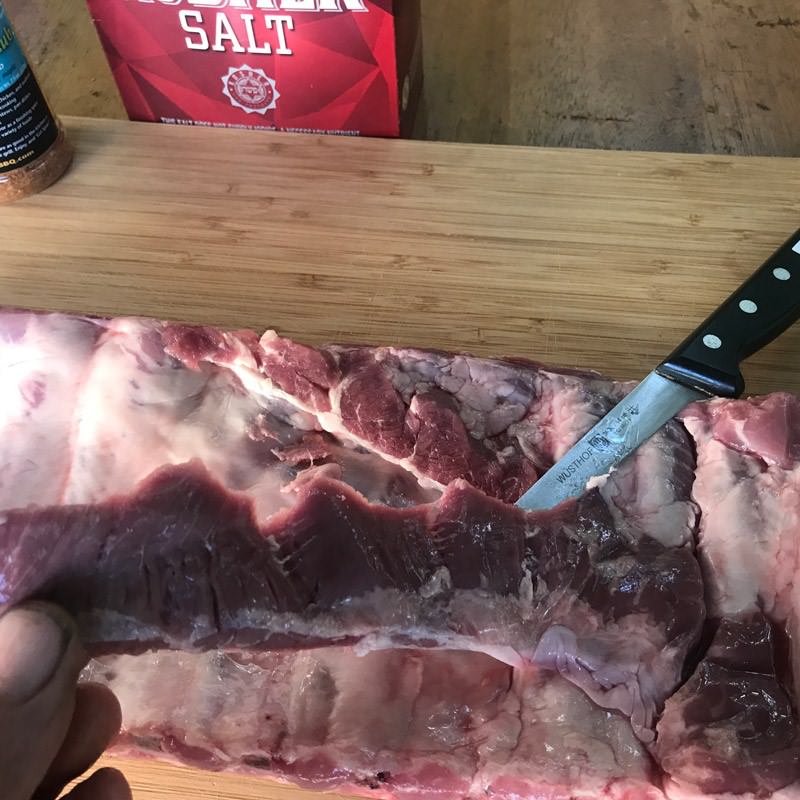
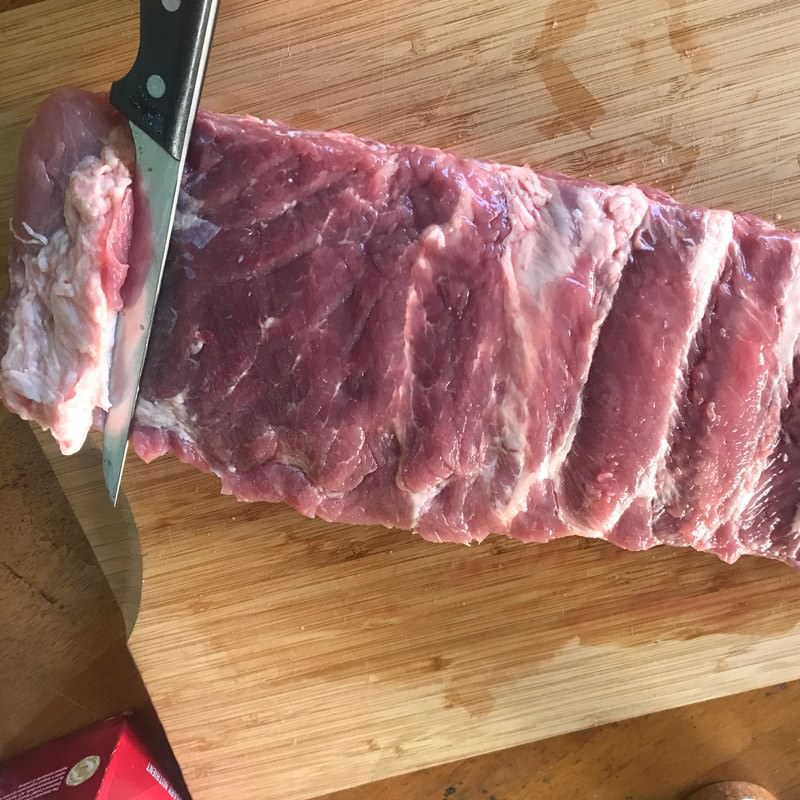
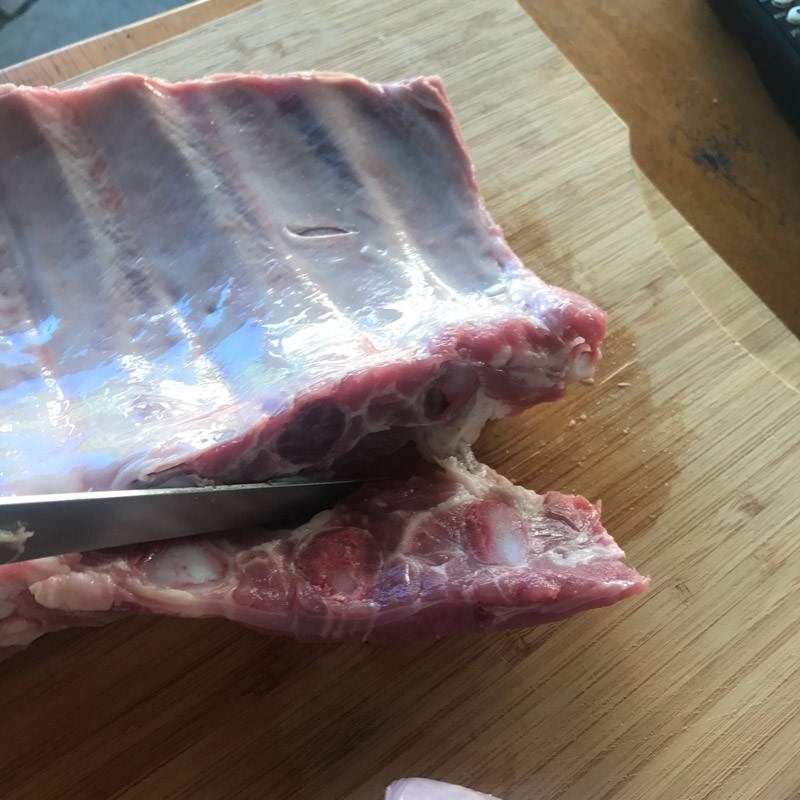
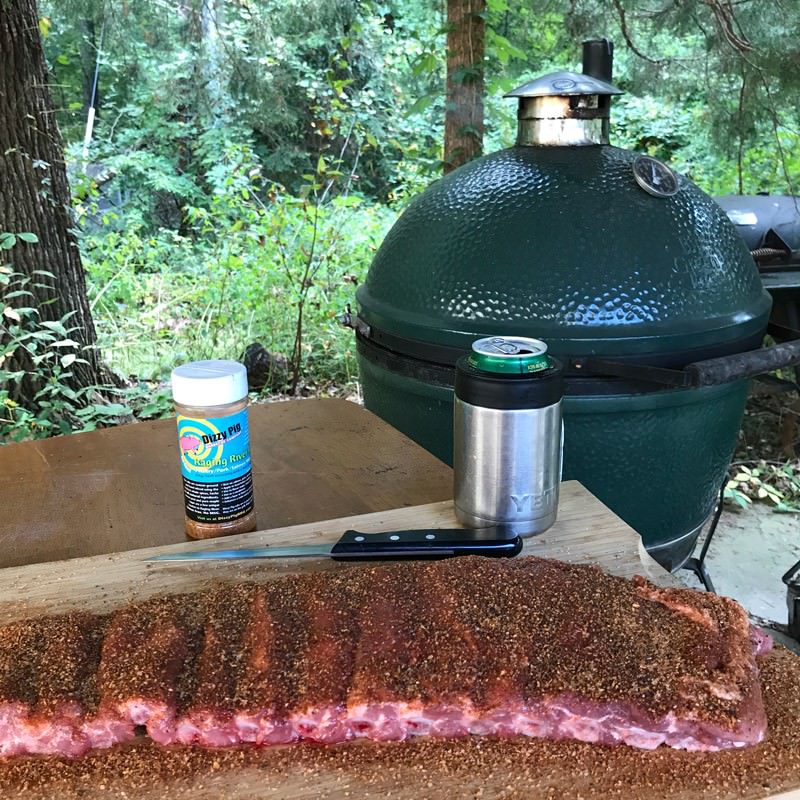
For our competition ribs, we use St Louis cut spare ribs. These are spare ribs that have the rib tips removed and are more uniform in shape. Rib tips (also called brisket) are full of cartilage, and on a competition rib, we only want to use the bone, so we purchase St Louis cut.
First time Making Ribs? Check out our Dizzy Tips!
How to Select Pork Spare Ribs
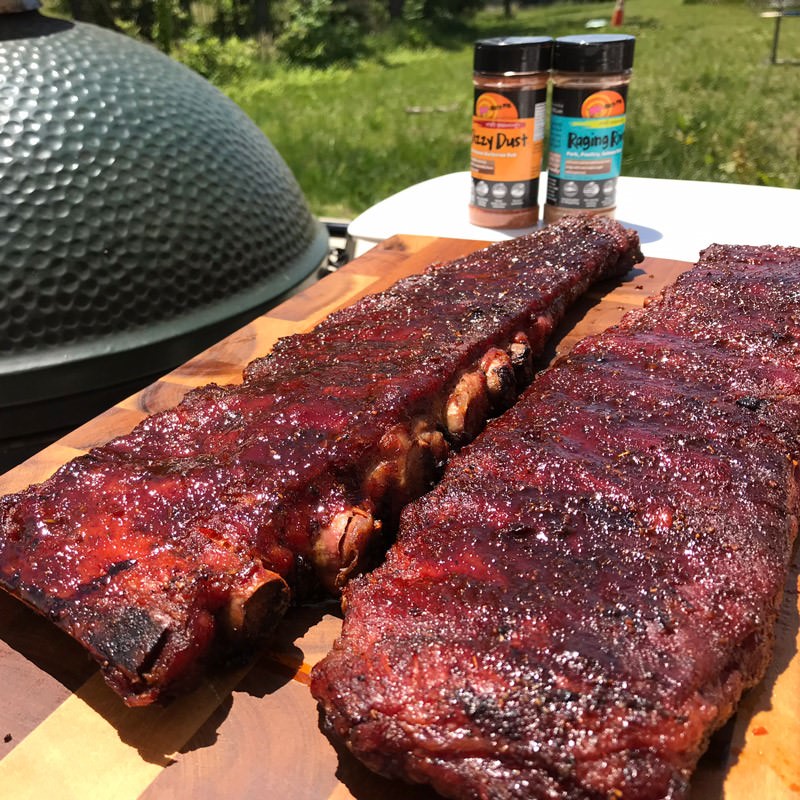
A perfect rib is bursting with flavor – plump, moist, and tender. Achieving that magical rib is not really magic. It is a combination of proper cooking technique and cooking them to the perfect doneness. There is no right or wrong technique really, as long as you get great results. So I won’t try to tell you that this is the only way – it’s just the way that works best for me.
My goals are for ribs that:
- Have a great smoke flavor
- Attain a nice brown caramelized flavor crust on the meat
- Cook until perfectly tender
 Cooking Method
I do this in two stages. During the first stage, I want to build up that flavor and color on my ribs, and for the second stage, I want to cook them until they are tender without allowing them to lose any moisture.
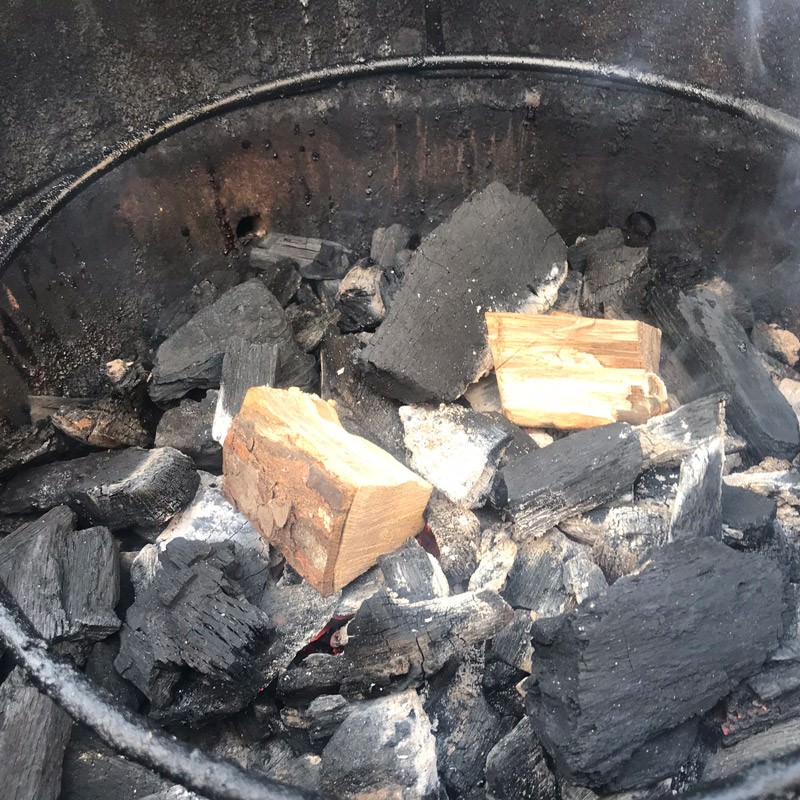
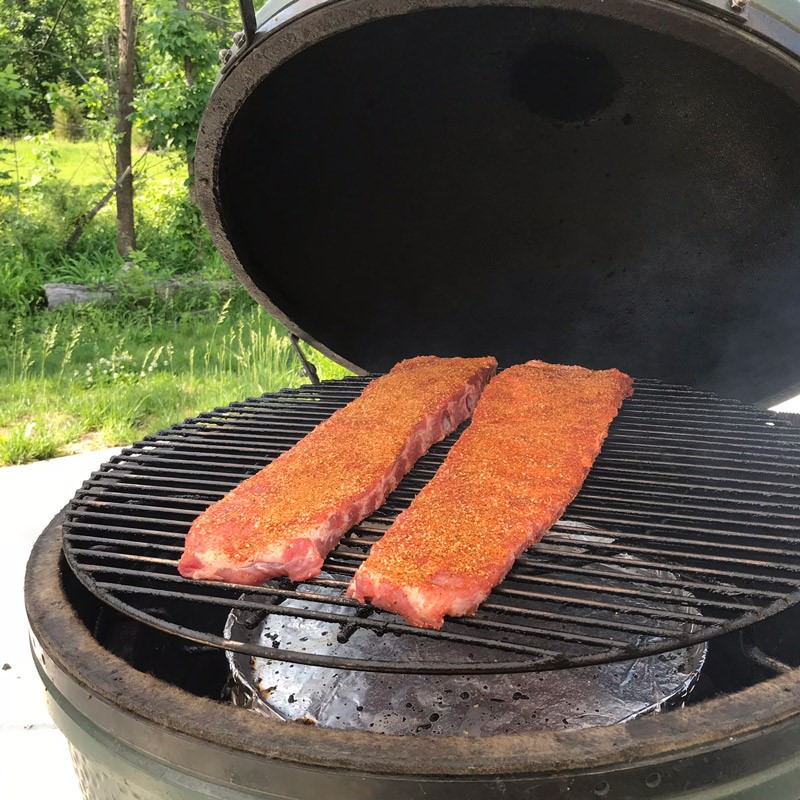
Stage 1 – The Flavor Stage
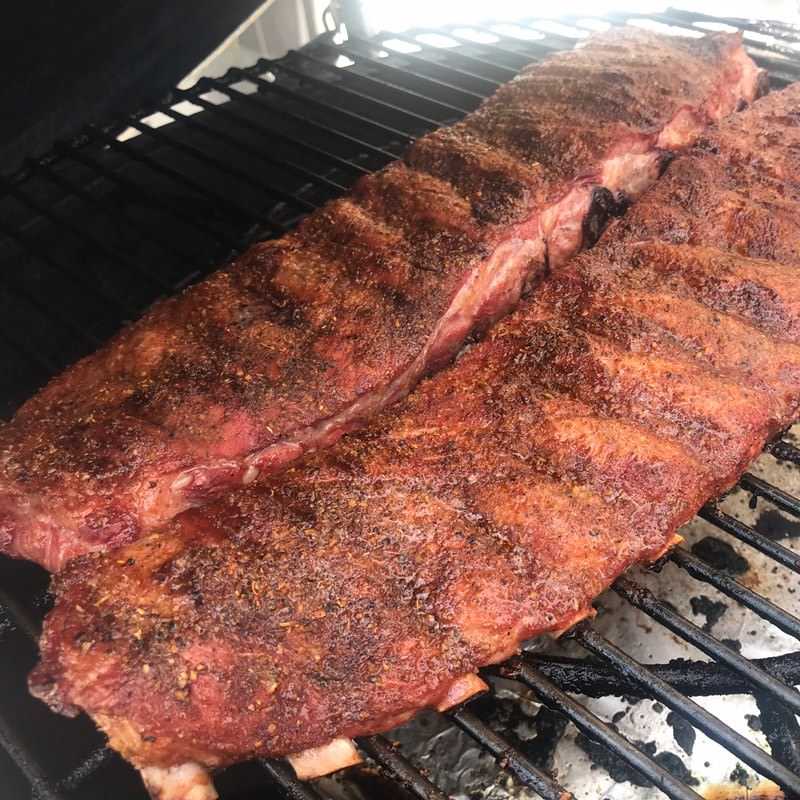
During this first stage, we like to cook the ribs with a good clean smoke until they are well browned and caramelized. This is the stage where you can choose what timing not only works best for your schedule, but gives you your preferred results.
For me, on my personal cooker, the Big Green Egg, I cook them indirect at 250°F for about 3.5-4 hours.
But great results can be had with widely varying times.
You can actually build up enough color and flavor in less than 2 hours at a higher temperature, though the cooking becomes a little trickier the hotter you go. You’ll need to keep a close eye on the color, and even turn your ribs occasionally to avoid burning them.
If you want to go the low/slow route, you can take 5 or more hours for the first stage.
Approximate Temperature – Time Ranges for 1st stage (YMMV)
220°F – 6 hours
230°F – 5 hours
240°F – 4 hours
250°F – 3.5 hours
265°F – 2.5 hours
280°F – 2 hours
300°F – 1.5 hours
I’ve settled on my favorite and have presented that technique. This is mainly to show you that there are a lot of possibilities. Experiment and find your favorite!
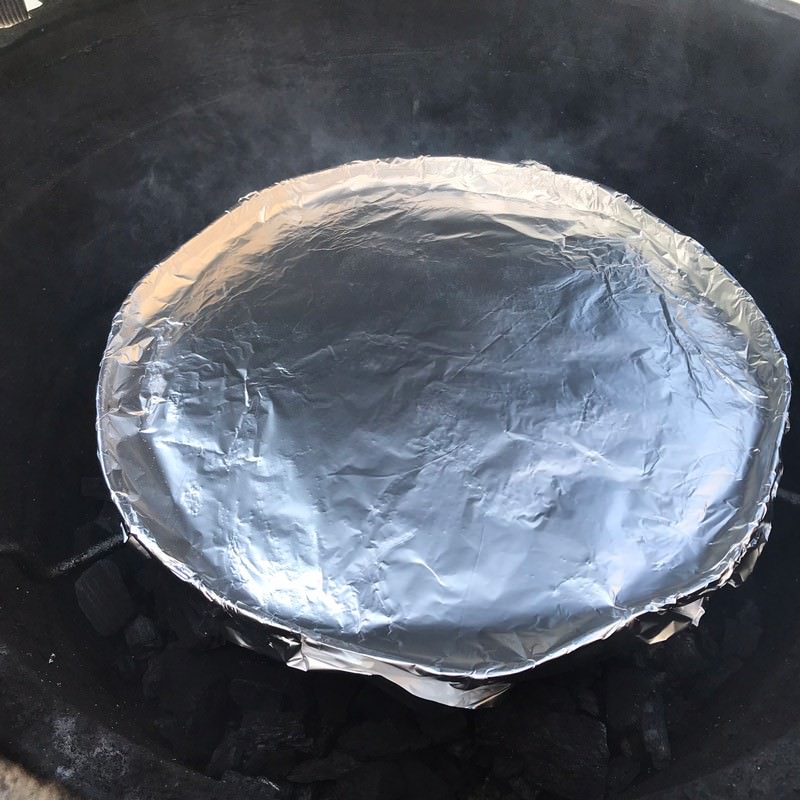
Stage 2 – The Tenderize Stage
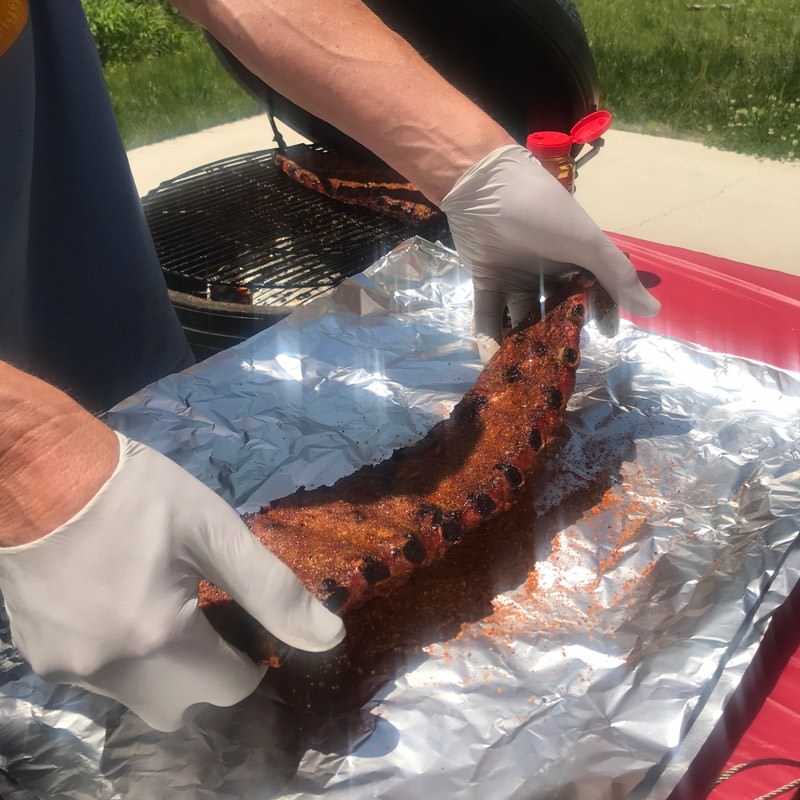
Once you have the color and flavor that you want, we want to continue cooking the ribs until they are tender, but our goal is to stop water from evaporating from the meat. This will allow them to cook to the tender stage quickly without losing moisture.
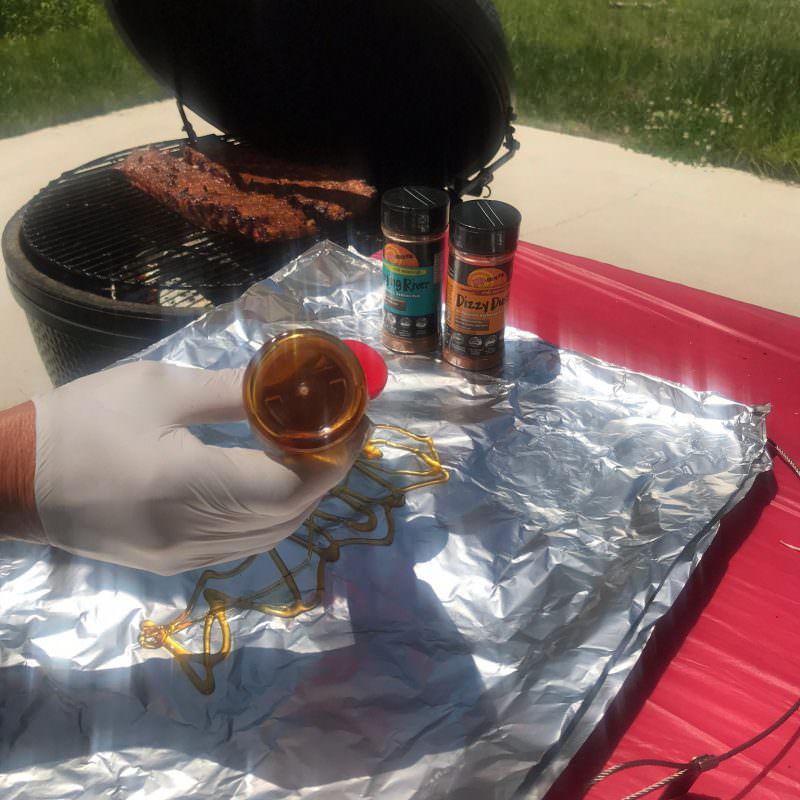
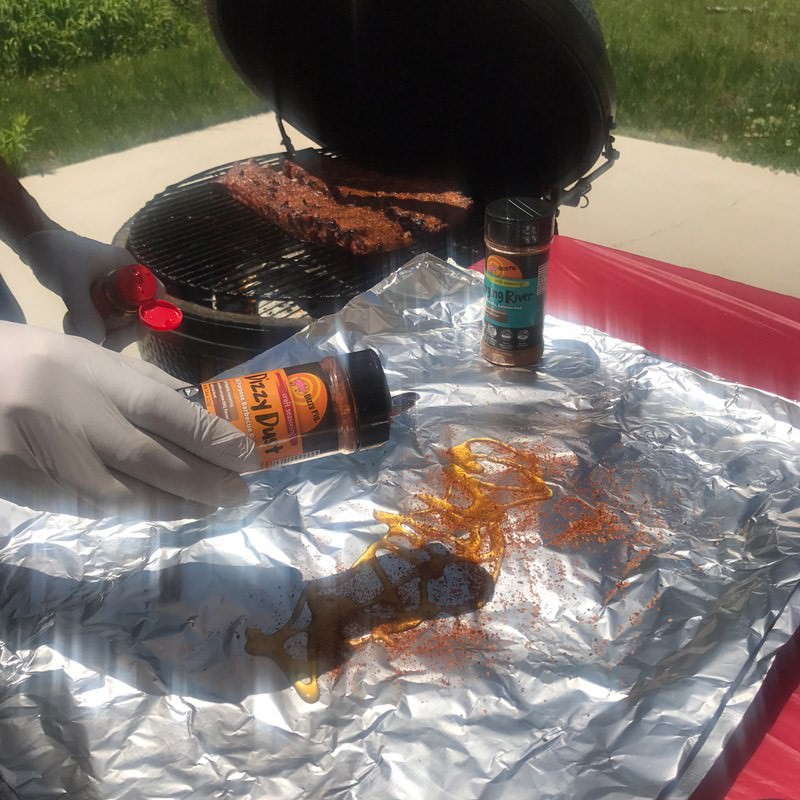
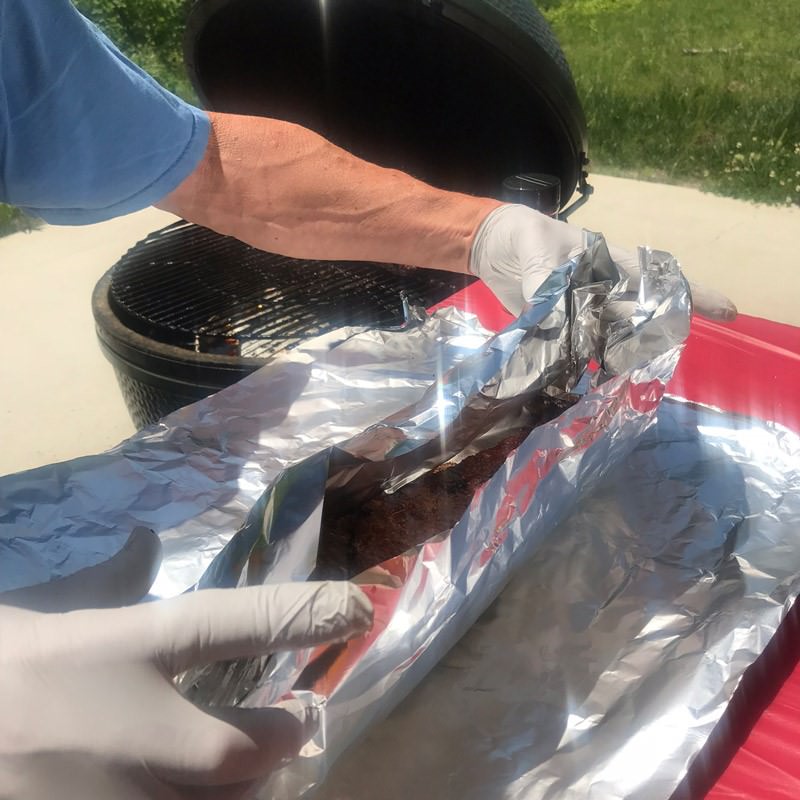
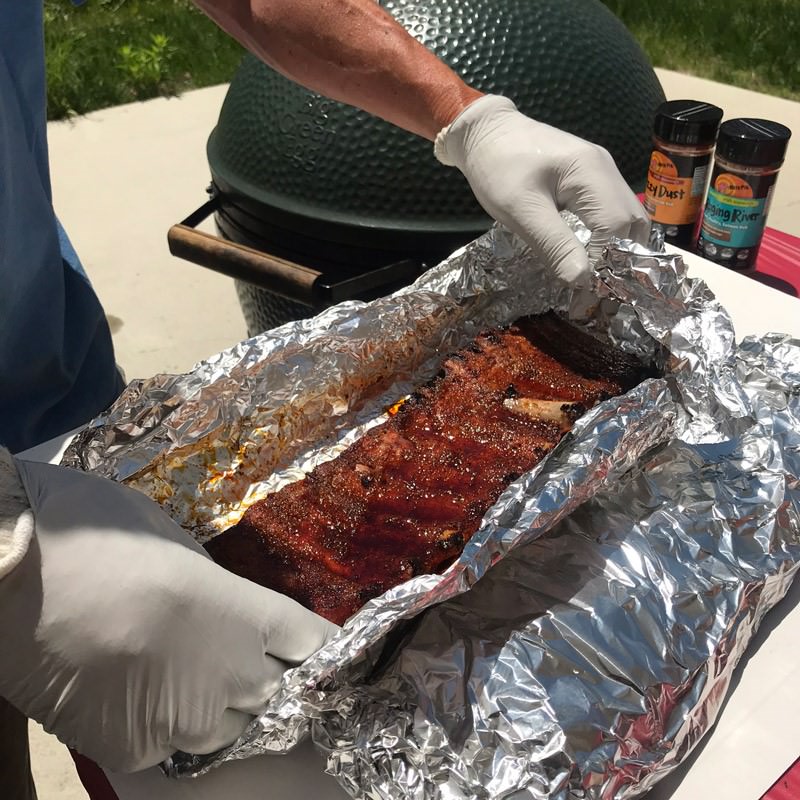
Heavy duty aluminum foil is our tool of choice for this step. We wrap the slabs individually, each with 2 pieces of foil. This allows us to remove each slab from the cooker as they are done, since they won’t all be done exactly at the same time.
The meat temperature is generally 165-175°F when we wrap them, but we are also looking for good color and flavor.
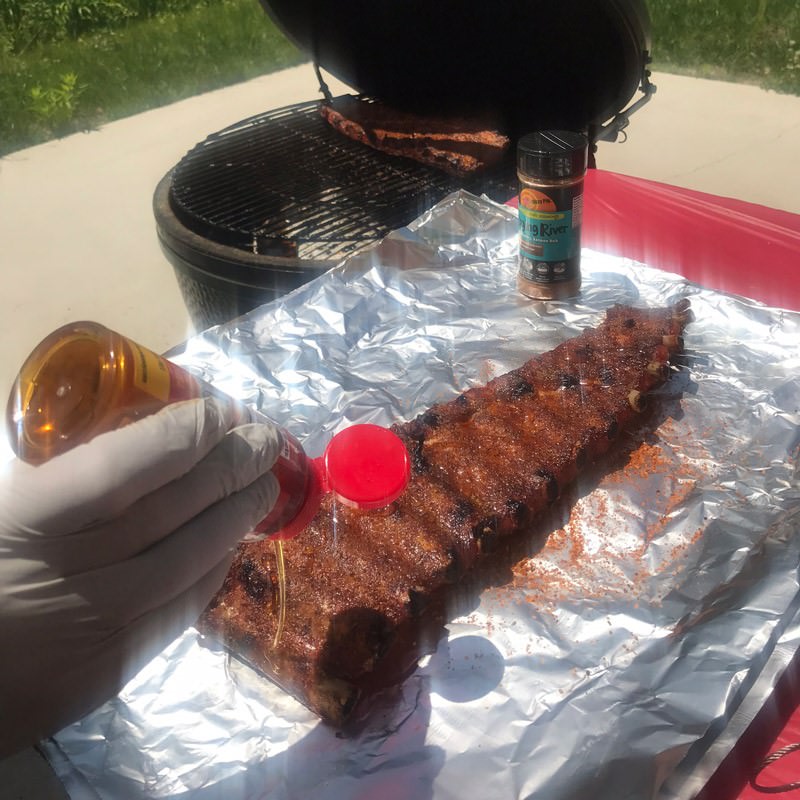
Whether you add anything else when you wrap the ribs is up to you. We’ve seen many different ingredients used in the wrap, including brown sugar, honey, maple syrup, hot sauce, butter, margarine, fruit preserves, etc. But all we use is some honey and a little bit of fresh seasoning… Dizzy Dust being our favorite.
Back on the Cooker
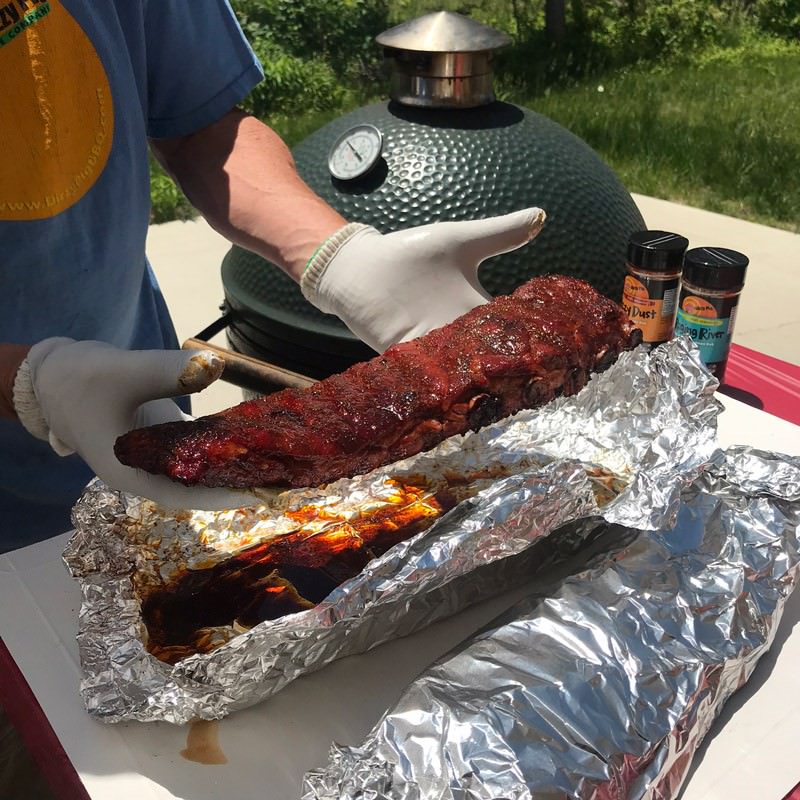
Return the ribs to your cooker once they are all wrapped. For this stage, we prefer to cook it at 240-250°F at the highest. And generally it takes less than 2 hours until they are tender.
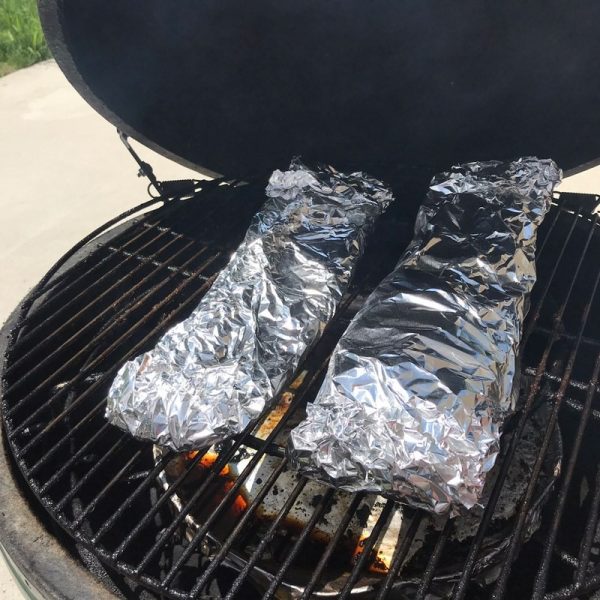
It is easy to overcook the ribs if left too long in the foil. So after about an hour, we recommend that you open the foil and flip the ribs over so that the bone side is down.
This step not only helps even out the cooking, but it gives you a great opportunity to judge the doneness of the ribs. They may be done if they want to break in half when you flip them, or are very flexible. In this case, you will want to get them off the heat and let them rest. More likely, they will still need more cooking and you will be able to tell by how stiff the slab is.
 Judging Tenderness
Probably the most important part to making great barbecue is to stop the cooking process once the meat has reached the tender stage. Once all the collagen and connective tissue has dissolved into gelatin, the meat will be tender. Any additional cooking will simply make the meat mushy.
A few ways to check tenderness are:
- Pick up the slab in the center (with heat resistant gloves, of course) and begin to lift. If it continues bending until it wants to break, they are likely done.
- Pick up the slab with one hand on each end and feel how easily they bend. If they flex easily on the thicker end, they are likely done.
- Take a toothpick and insert between the bones in the thickest part of the slab. The toothpick should go in easily, and not resist when you try and pull it out. If it tugs back on you a little, they need a little more cooking.
- Take the meat temperature. This is not the most reliable method as there are many factors affecting what the temperature of the meat is at the time they are tender. However, knowing the temperature can give you a good idea of when to begin checking for tenderness. In my experience, 190°F is a great time to begin checking for tenderness, but I have seen ribs that weren’t tender until they reached 205°F or higher.
- Seeing the meat pull back from the bones. Again, like with meat temperature, seeing the meat pull back so the ends of the bones are exposed is a sign that things are moving along. But remember, every slab acts differently, and there are different degrees of pulling back from the bone. This is just one thing to observe, and not a “tell-all”.
 Once They are Tender…
They are done! They can rest for up to an hour if covered in a blanket. But we always try and rest them for at least 15 minutes before slicing.
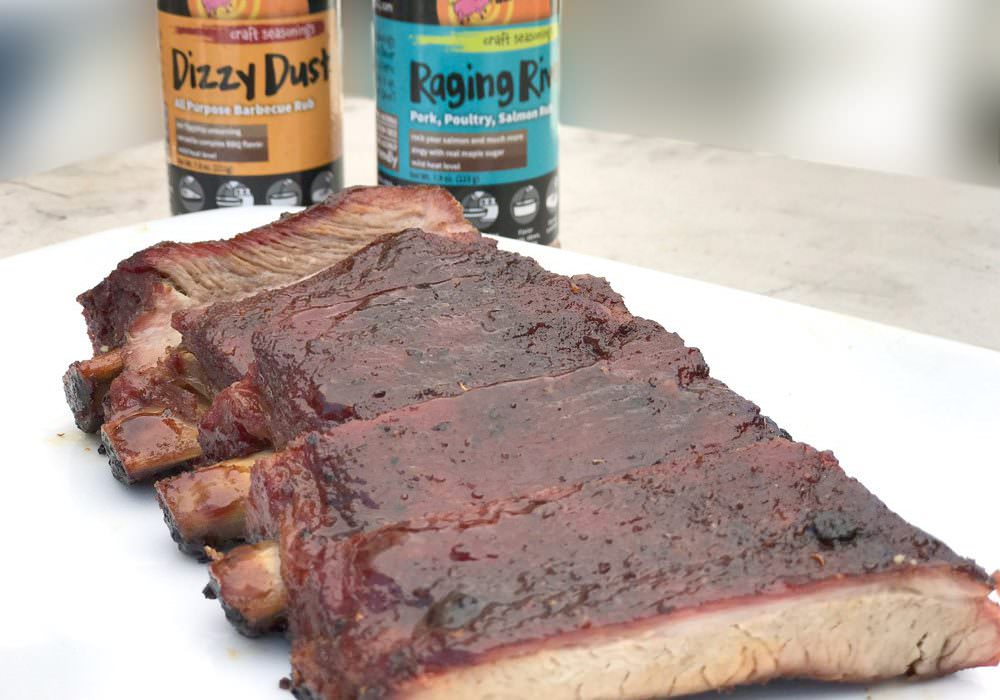
You may have seen a process called 3-2-1 where the ribs are returned to the cooker unfoiled for an hour at the end. We have found it to be unnecessary. In fact, we don’t even sauce the ribs until after they are cut. We don’t see any benefit to cooking the sauce on, and they are much easier to slice with the meat side down so you can cut perfectly between the bones.

Once sliced, we sauce the meat side lightly, though this is an optional step. Many prefer a dry rib, and there is nothing wrong with that!
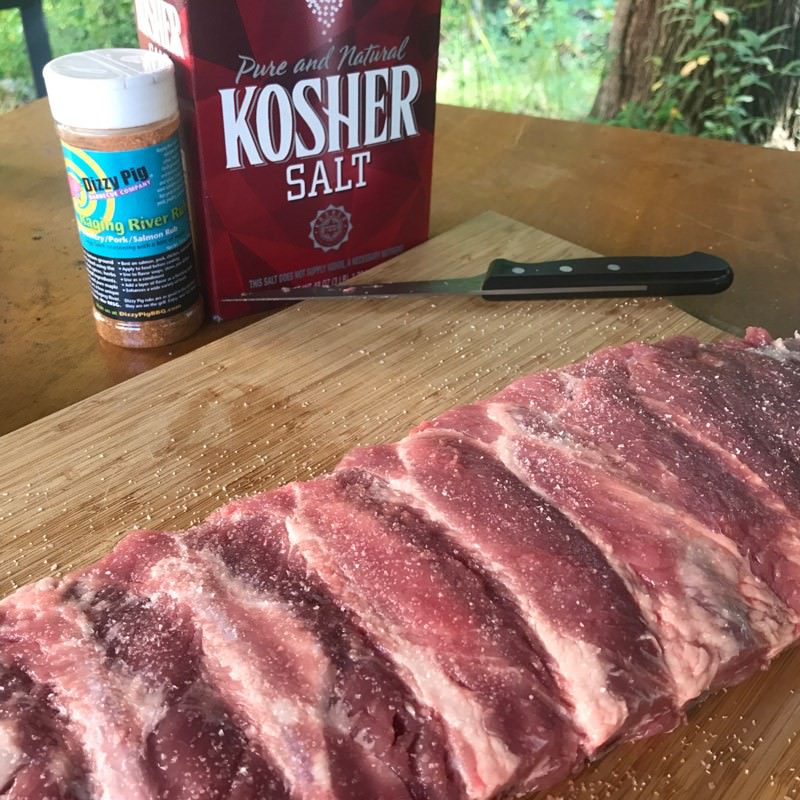
Ingredients
Print Recipe- 2 slabs St. Louis cut Spare Ribs, preferably at least 3 lbs each (Baby back ribs can be used)
- Salt (optional)
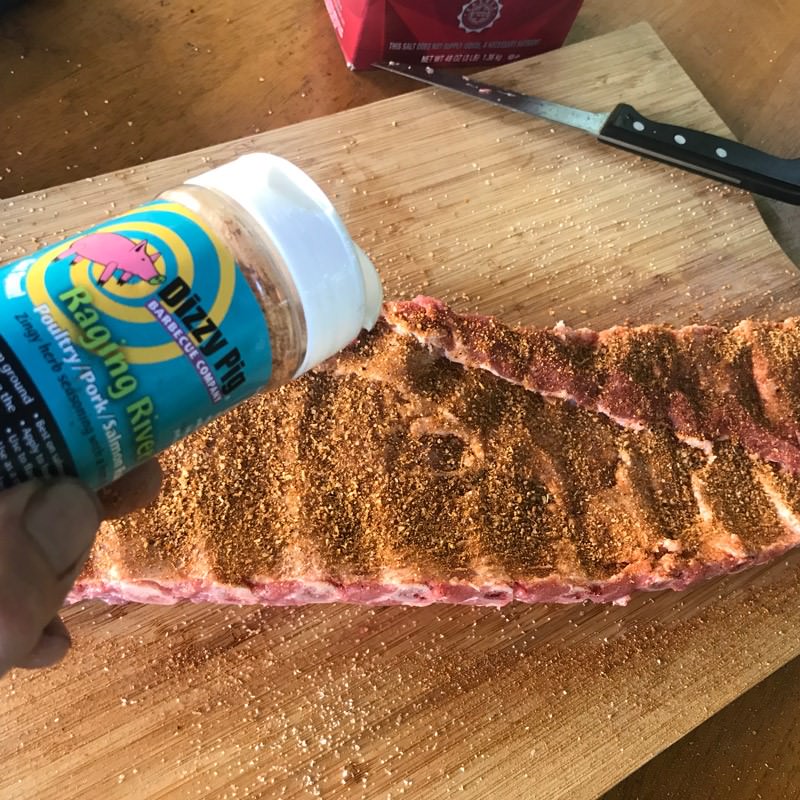
- Dizzy Pig Raging River (Dizzy Dust and Crossroads also great choices)
Wrapping:
- Dizzy Pig Dizzy Dust
- A few Tbsp honey